Keeping a room clutter-free is easier said than done for many girls. Thankfully, there are lots of easy-to-follow DIY girls room ideas for organizing spaces, like the ones I’ll be sharing here with you. The best part about DIY guides is it not only shows how to declutter your space, but how to recycle and repurpose stuff as well.
You’re not just doing your room a favor, you’re also reducing waste and going green! Isn’t that cool or what?
So if your room is shouting for a much-needed decluttering, read through these clever girls room ideas, and try one or two tricks yourself.
Girls Room Ideas: Resourceful Ways To Declutter Your Space
I love seeing girls get in the habit of decorating and organizing their own rooms, especially through repurposed and recycled materials. As early as possible, we can teach young ones how to be responsible, not just with their own stuff, but with the environment as well.
Here, let me share with you how to transform old materials into neat storage solutions. Acquire new methods of organizing wardrobe, to keep clutter at bay. So, keep on reading for some of my highly recommended girls room ideas.
1. Upcycled Storage Box

Turn a plain box into a pretty storage with multiple compartments in just a few steps.
Here’s what you’ll need:
- Small or medium sized box
- Cutter
- Ruler
- Scissors
- Glue Gun
- Glue sticks
- Decorative Paper
- Packaging Tape
Step 1: Cut the top flaps

Using a cutter, cut the top flaps of the box. Keep the flaps as these will be used as dividers.
Step 2: Reassemble the box

Reassemble the box, and secure the bottom portion with packaging tape.
Step 3: Remove excess height of box

Measure the flap against the height of the box, and make sure they’re of the same size. Remove the excess portion of the box with cutter and scissors when necessary.
Step 4: Cover the box

To give your box some flair, cover it with colored or decorative paper of your choice.
Step 5: Cut the flaps and cover them

Get two flaps, and cut each into three portions to yield six small dividers. Set aside two uncut flaps for big dividers. Cover each with decorative paper.
Step 6: Place the dividers inside the box

Place the two big dividers horizontally, then place the six small dividers vertically.
Step 7: Secure the dividers

Use a glue gun to secure each divider in place. Leave it to dry for a couple of minutes then you can use it as storage for your gadgets or crafts.
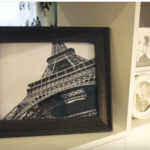
2. Repurposed Frame

Here’s an inexpensive way to organize small items in shelves, using old picture frames.
Step 1: Select a good-sized frame

Select frames with taller borders. These will better help hold items in place.
Step 2: Use the frame like a tray

Use them to organize stuff in your shelf that requires easy access. Like school supplies, personal care items, or make up.
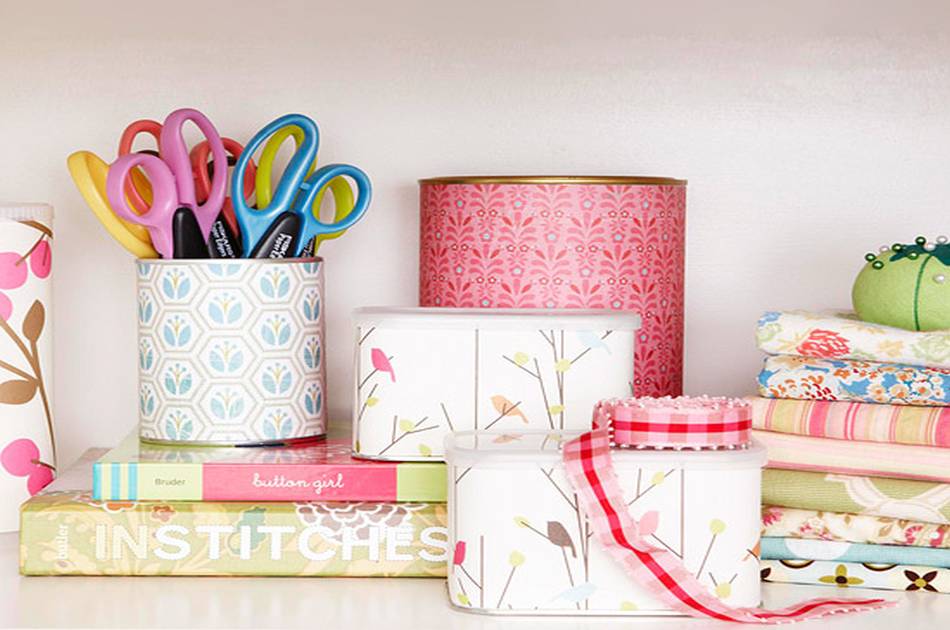
3. Spruced Up Canister

Breathe new life to a throwaway canister with these simple steps.
Here’s what you’ll need:
- Empty powdered chocolate canister/container
- Yarn
- Glue Gun
Step 1: Clean canister

Clean both the inside and the outside portions of the canister. Peel off the label, and wipe off any food debris on the inside.
Step 2: Attach yarn to canister

Secure the tip of the yarn to the bottom portion of the container using a glue gun.
Step 3: Cover canister with yarn

Wrap the yarn around the canister, occasionally putting glue to hold the yarn in place.
Step 4: Cut excess yarn

Remove the excess yarn once you’re done covering the entire canister. You can use the spruced up canister for random items you want out of sight, or as a holder for your arts and crafts tools.
4. Scarves Hanger

Easily hang and organize your scarves behind the door with this smart idea using accordion hooks.
Here’s what you’ll need:
- Accordion hooks
- Adhesive hooks
Step 1: Mount adhesive hooks

Place the adhesive hooks according to your desired height.
Step 2: Place the accordion hooks

Hang the accordion hook on the adhesive hooks. Make sure it’s secured in place.
Step 3: Hang scarves

Tie each scarf into a knot, and hang them on the accordion hooks. This will keep all your scarves accessible, and in one place.
5. Organized Drawer

One of my favorite girls room ideas that totally works is this drawer organization technique.
Step 1: Fold clothes

Depending on the length of each clothing, fold them into small uniform portions.
Step 2: Arrange clothes vertically

Unlike the usual way we pile clothes in the drawer, stuff them in a vertical position, making sure each piece can be clearly seen. By doing this, you can easily identify and grab specific items without getting others out of their place.
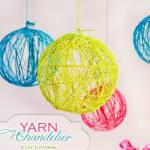
Watch the full tutorial video from JENerationDIY:
Weren’t these girls room ideas fun and helpful? Start your own bedroom makeover or clean up project now. I’d love to read about it in the comments area!
Want more amazing girls room ideas for your next project? Check this out!
Liked these girls room ideas? You’ll also like:
12 Creative Girl’s Room Decor Hacks Using Washi Tape
[Video] Living Room Ideas: Paris-Inspired Shared Bedroom Decorating Tips For Your Sweet Girls
Featured Image via Better Homes and Gardens
Originally posted on September 5, 2016 @ 6:09 AM